This type of photography makes use of a plastic toy camera called lomo camera that makes use of film. The lomo camera does everything which it’s not supposed to do, i.e. saturated colors, high contrast, off hues, vignettes, blurs, and much more. These are some of the unique features which have turned out Lomography into a most popular art form.
Today, technology is advancing day by day; when we talk of regarding the field of photography, it has really grown by leaps and bounds. The availability of high megapixel cameras is the output of the advancement in technology. These days, digital cameras of high megapixel are available in the market which produces beautiful, high-resolution images, automatic settings, high-speed shutter settings, etc. All these provide a solid base to the photographer’s career which in turn lays the foundation of the success of different forms of Photography. Lomography is not the exception of this. Let us have a look over the Lomography in detail.
One can view the photographs at the time it is clicked and can delete it or to keep it as per desire. These features were not available in earlier film cameras. The today’s available cameras provide that much facility that it is easy to become a photographer for everyone. Now, one question arises here that where the problem comes in the way of Photography?
What is Lomography?
Lomography is a pretty recent type of photography invented by the Lomographic Society, founded in the early nineties in Austria. It is considered as a movement in the art field as we see nowadays there are various stores, galleries, groups, competitions and embassies around the world which aims to spread and support this new arriving form of art. The time when founders have discovered it, it was not expected that one day it will become so popular. The founders have first of all experimented with a cheap Russian toy camera, namely Lomo LC-A, and found the amazing result. From then, it has been brought into fashion and today, it is a most developed kind of art or photography. These days, there are number of original lomo cameras including the LC-A, Holga, Fisheye, Colorsplash and Supersampler and many more.
How to Get Started?
Whether anyone is a seasoned photographer or a novice one, everybody can learn how to get started with Lomography. Only there needs to keep patience and appropriate methodology to learn. We are detailing here steps by steps how to get started with this form of photography.
⇒ Choose your weapon:- As we have discussed earlier, there are many different kinds of lomography cameras available nowadays; and thus it is very difficult to choose which one is the best? Here, you need to be of decisive and it is advisable that you have to choose the one which serves your need in a best manner and which offers you maximum features and effects. You should keep on your research until you determine the camera on the basis of the type of photos you want to achieve.
⇒ Choose your film:- After you decide which lomo camera you have to use, now let’s decide which film you would like to use or which fulfills your needs. As there are different kinds of lomo cameras, likewise lomo cameras use different kinds of films. For, beginners, it is advisable that, do not make additional expenses and hassle on film, and start working by choosing the regular 35mm film
⇒ Experiment with different effects:– Once you finalize your camera and film to be used, now experiment with different effects of photography. You should create funky pictures with your lomo camera with long exposures, double exposures, red scaling, and many things. Multiple exposures are a fun effect in lomography which you can try and limited to fun only, it will also make your hands free. Play with the rules of Lomography, either follow or break them; both will make you learn something and will give you a new and unique experience.
⇒ Finally, meet and share with fellow lomographers:– Now, you must have learned some aspects of photography, taking different shots from different angles and multiple exposures. You may share your lomo shots online or you may show it to your fellow lomographers while having meet with them.
You can also check out other people’s shots who are expert in the concerned field so that you can be inspired by them. Try to keep on learning new lomo techniques, update yourself about the launches of new lomo cameras, film and other products. These all will along with continuous practice will convert you a perfect lomographer.
How to Achieve Lomography Effects through Photoshop
Although, lomography is expensive and time-consuming, but Adobe Photoshop is one such tool which lets you get yummy lomo photos in a faster and in a much cheaper way.
One of the disadvantages of the Lomography art, that the lomo cameras are too much expensive, least price worth $25, and the matter is not only of price, one cannot also view pictures until the whole roll is over, and then the pictures are processed and scanned afterwards. All these takes much more time. Adobe Photoshop is one of the alternatives where the lomography fans can achieve lomography effect, and this too at much cheaper rate and fast pace. Lets’ see which of those features of Lomography which can be done in Photoshop in an excellent manner.
Vignettes
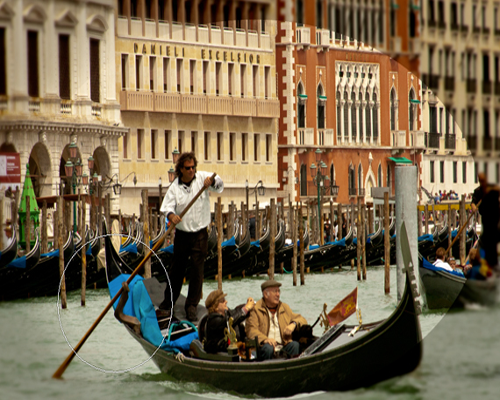
Vignettes are one of the common features in lomo photographs which are characterized by a loss of clarity in the sides or corners of the image. It is often darker and blurry in the sides, but sharp and bright at the middle.
Creating a vignette in Photoshop is extremely easy and can be done in few minutes. Let us see how to do in the steps described below:
STEP-1:- First of all open the image you want to add a vignette to and then copy the image and paste it in a new layer. Now you have the same images in two layers. For example, let us suppose the below given figure:
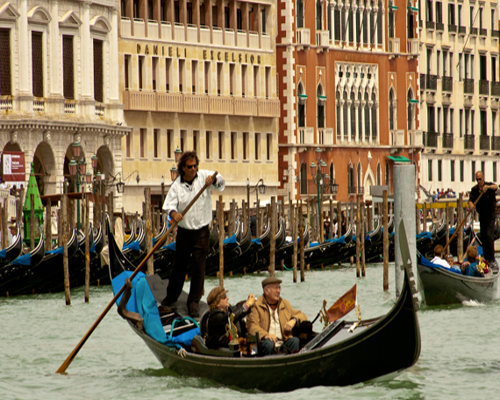
STEP-2: Now, on the top layer, select the elliptical marquee tool and then select and drag in such a manner that the entire image is included apart from the sides and corners, as shown in figure given below. After, final selection of image has been made, now right-click inside the selection and click on ‘Select Inverse’. This will swap the selected area, resulting into the selection of the outer areas.

STEP-3: Now in this step, adjust the brightness of the outer edges by selecting Image -> Adjustments -> Levels. On Output Levels, drag the light arrow to the left to make it darker. After then, go to Filter –> Blur – > Gaussian Blur to create soft edges. Here, you are free to adjust settings as per your desire.

STEP-4: Make sure that, only editing is done in the top layer without disturbing or making any changes in the bottom layer. Now, in order to smoothly blend the vignette to the image, select the erase tool; set the brush tool to a big brush at 0% Hardness. The final output should look more or less like the image below. Here, you can also adjust the brightness or contrast of the image according to your desire so that it can simulate the image more.
Cross-processed Photos
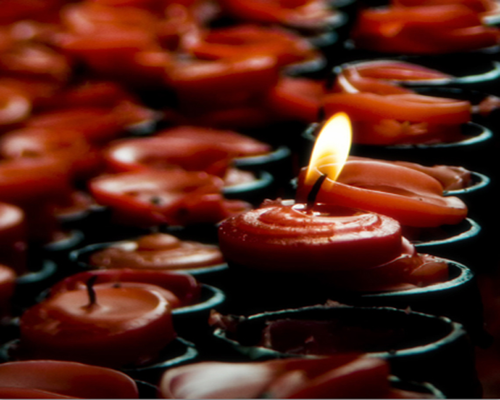
Another feature which you will most often find in the lomography is the cross processing of photos. You have most often seen the Lomography photographers cross processing their film, giving their photos weird colors and saturation. Actually, cross processing is an old darkroom technique which involves deliberately processing film with a chemical solution intended for another kind of film. Here we are showcasing how you can do cross-processing through Photoshop. Go through the steps given below:
STEP-1: Open any image in Photoshop as shown given below.
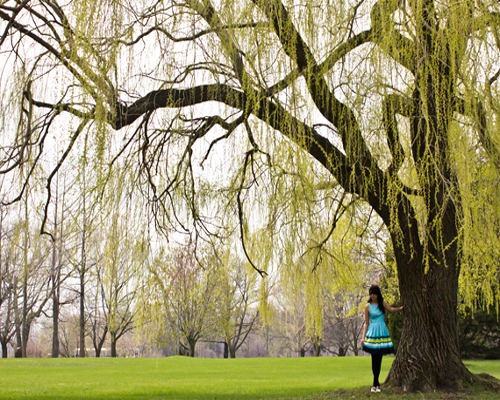
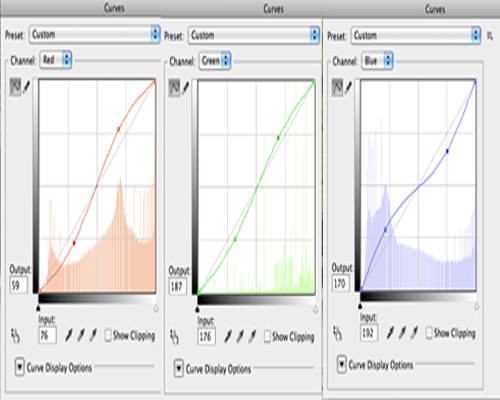
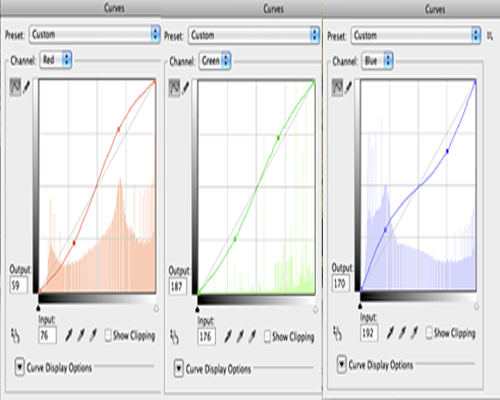
STEP-2: Now, adjust the contrast level of the image until you are satisfied. Then open Image –> Adjustment – > Curves. Here, In Red and Green Channels increase the Highlights, and drop the shadows while in the Blue Channel, raise the Shadows and reduce Highlights.
STEP-3: You will get the effect as shown below in the figure which is your final output.

Multiple Shots
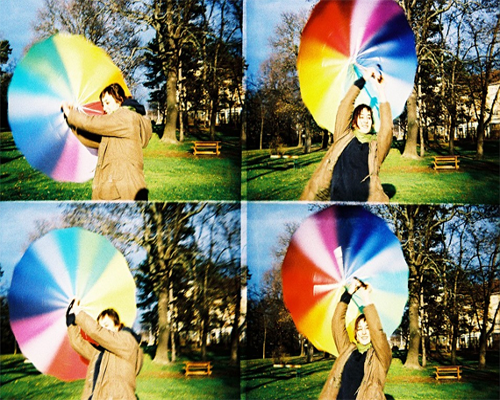
You have most often seen that many lomo cameras feature multiple shots in one single image: the Action Sampler, the Super Sampler, the Oktomat, etc. No doubt, this type of effect can also be created in Photoshop. Only you need to take continuous shots of the same place and subject and juxtapose it together in the Action Sampler / Super Sampler / Oktomat layout; we assure you it will look just the same. After then you can even add the vignette, noise and contrasted effect to make it more lomoish. The below image is an example of super Sampler Shot.
Fisheye Effect
This is a cool effect which is generally created by SLR cameras which are having fisheye lens. But you need not to worry, if you don’t have a fisheye lens or a fisheye camera as we are providing here a quick way to get it effectively in Photoshop. Let us see how?
STEP-1: Choose the image on which you want to create the fisheye effect. Crop it into a square by holding down ‘Ctrl’ while dragging to the desired area.
STEP-2: Select the Elliptical Marquee Tool and hold down ‘Ctrl’. Hold down until you select the whole image. Right click and select inverse, and fill the inverse area with black or white.
STEP-3: In order to create the fisheye effect, simply open Filters –> Distort –> Spherize. Then choose 100% and click OK. You will get similar to the below image as your final output.

Conclusion:
Going through the above post, now you must have gain a concept of Lomography and how to achieve lomography effect in Photoshop. Nowadays, Lomo shots are continuously becoming popular, due to which, mobile application developers are now taking a piece of the pie. One of the most popular lomo applications is Instagram, which gives lomo filters to your otherwise dull iPhone shots. The rise of these popularity to the iPhone applications due to the lomography effect, has given rise to a new term, i.e. iPhoneography. It literally means that, now applications are available to simulate lomo effects of your digital photos for both the Android and iPhone.
Hopefully, you have enjoyed the post. Please share your thoughts with us through your comments.
