When the things come about coding up designs, there are lot of things to look after towards, though every personal has their own preference and priorities to do things according to their own way. Some people attempt to get indulge in and juggle writing HTML, CSS and exporting images through the layout according to the necessity and all at the same time. You will be amazed to know that this is the most common method which regularly employed. However, some people used to classify this into different stages such as write HTML, export images and then style with CSS. But to the very personal, always we don’t know about all images we need to extract through design until the we split the layout into HTML. So, the preferred work procedural will be something like this:
- Plan structure then opt to write HTML code
- Export pictures from the layout
- Style the HTML with CSS
Therefore, following this working procedural let’s start writing our HTML.
Preparation
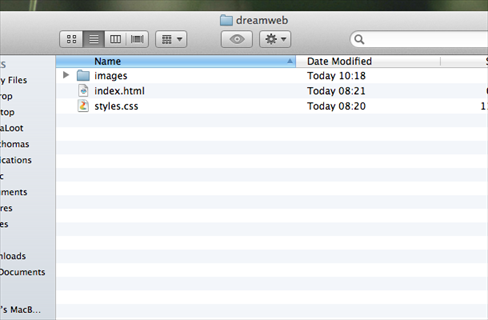
You can initiate by making a new folder with index.html and styles.css files. Then make another new folder termed as images.
Doctype and Structure
Here, you are required to open the file index.html in your preferred code editor.
<!DOCTYPE html>
<html>
<head>
<meta charset="utf-8" />
<title>Dreamweb</title>
<link rel="stylesheet" href="styles.css" type="text/css">
<link href='http://fonts.googleapis.com/css?family=Pacifico' rel='stylesheet' type='text/css'>
<!--[if IE]>
<script src="https://html5shiv.googlecode.com/svn/trunk/html5.js"></script>
<![endif]-->
</head>
<body>
</body>
</html>
Now, we will attempt to start by including the basic skeleton of HTML, as we are employing HTML5 for this project therefore the declaration of DOCTYPE is very simple, just “HTML”. The remarkable things are that we have already set the page title, include our stylesheets (styles.css), add the Google web font and also incorporate the HTML5shiv JavaScript fragment of code which make the older browsers such as Internet Explorer to comprehend HTML5.
Header
<header>
<div class="wrapper">
<h1 class="logo"><a href="index.html">Dreamweb</a></h1>
<ul> <li class="active">
<a href="index.html">Home</a></li>
<li><a href="#">Portfolio</a></li>
<li><a href="#">About Us</a></li>
<li><a href="#">Blog</a></li>
</ul>
</div><!--.wrapper-->
</header>
Here, we are supposed to assign the tag for header, and then place a wrapper inside this in order to transform the header to 100% wide, but the content is wrapped to a fixed width of 960px, include the logo as H1 and generate an unordered list regarding main menu.
Main Feature
<section class="home_feature">
<div class="wrapper">
<article class="main_display">
<img src="images/display_image_1.jpg" alt="Client Work" title="Client Work" />
<div class="display_gloss">
</div>
<article class="banner_new">
<p>New</p>
</article>
</article>
<article class="feature_text">
<h2>Vivamus sagittis lacus vel augue laoreet rutrum faucibus dolor auctor</h2>
<p>Cras justo odio, dapibus ac facilisis in, egestas eget quam. Integer posuere erat a ante venenatis dapibus posuere maecenas faucibus mollis interdum. Velit aliquet. Maecenas faucibus mollis posuere velit aliquet interdum.</p>
<a href="#">Click me to find out more</a>
</article>
</div><!--.wrapper--> </section>
Now, you can employ the same technique of wrapper for main feature from header. Now, we are empoloying a <section> to incorporate two <article>s in this section of this layout. The feature text is completely straight forward, we have some paragraph, H2 and a link. The computer screen will be our main_display article and then we will layering on top of that:
• the image that will be appear on the screen
• the image followed by gloss via screen
• and eventually the banner which sits in corner than reads “NEW”.
Featured Service
<ul class="featured_services">
<li class="service_1">
<Web Design&rt; <p>Cras justo odio, dapibus ac facilisis in, egestas eget quam. Integer posuere erat a ante venenatis dapibus posuere maecenas faucibus mollis interdum.</p>
<a href="#" class="button_1">Find Out More</a>
</li> <li class="service_2">
<Development&rt; <p>Cras justo odio, dapibus ac facilisis in, egestas eget quam. Integer posuere erat a ante venenatis dapibus posuere maecenas faucibus mollis interdum.</p>
<a href="#" class="button_1">Find Out More</a>
</li> <li class="service_3"> <Optimization&rt; <p>Cras justo odio, dapibus ac facilisis in, egestas eget quam. Integer posuere erat a ante venenatis dapibus posuere maecenas faucibus mollis interdum.</p>
<a href="#" class="button_1">Find Out More</a>
</li>
</ul>
The section of featured services of the layout is considered as a basic unordered list, therefore we have define distinct class for each list item in order to make it styled and targeted appropriately. There is no necessity of wrapper div due to lack of defined background. Simply we can set the <ul&rt; to 960 px wide dimension in the CSS.
About Us and Testimonials
<div class="wrapper">
<article class="about_us_blurb">
<About Us&rt; <img src="images/about_us.png" />
<p>Vivamus sagittis lacus vel augue laoreet rutrum faucibus dolor auctor. Donec sed odio dui. Aenean lacinia bibendum nulla sed consectetur. Donec ullamcorper nulla non metus auctor fringilla. Cras mattis consectetur purus sit amet fermentum. Nullam quis risus eget urna mollis ornare vel eu leo. Penatibus et magnis dis parturient montes, nascetur ridiculu.</p> <p>Donec sed odio dui. Praesent commodo cursus magna, vel scelerisque nisl consectetur et. Nulla vitae elit libero, a pharetra augue. Donec sed odio dui. Sed posuere consectetur est at lobortis. Lorem ipsum dolor sit amet, consectetur adipiscing elit.</p>
</article>
<article class="testimonials">
<Testimonials&rt; <div class="testimonial_wrapper">
<p class="testimonial_quote"> Vivamus sagittis lacus vel augue laoreet rutrum faucibus dolor auctor. Donec sed odio dui. Aenean lacinia bibendum nulla sed consectetur. </p>
<p class="testimonial_name">John Doe, Company</p>
</div> </article> </div><!--.wrapper-->
As we have already created 2 articles regarding about us blurb and testimonials. We own a wrapper which incorporate both the name and quote for the testimonials.
Footer
<footer>
<div class="wrapper">
<!--Twitter Widget--> <div class="column">
<article class="widget_twitter">
<h4>Twitter Updates</h4>
<ul> <li><strong>@MediaLoot</strong> Curabitur blandit tempus porttitor estibulum venenatis ultricies.</li> <li><strong>@MediaLoot</strong> Curabitur blandit tempus porttitor estibulum venenatis ultricies.</li> <li><strong>@MediaLoot</strong> Curabitur blandit tempus porttitor estibulum venenatis ultricies.</li> </ul>
<a href="#" class="button_1">Read More</a> </article>
</div>
<!--Newsletter Widget-->
<div class="column">
<article class="widget_newsletter">
<h4>Newsletter</h4>
<p>Cras justo odio, dapibus ac facilisis in, egestas eget quam. Integer posuere erat.</p>
<form> <input type="text" value="Email Address"> <input type="submit" value="Sign Up"> </form>
</article>
<!--Social Widget-->
<article class="widget_social">
<h4>Social</h4>
<ul> <li class="facebook"><a href="#">FaceBook</a></li>
<li class="twitter"><a href="#">Twitter</a></li>
<li class="tumblr"><a href="#">Tumblr</a></li>
<li class="behance"><a href="#">Behance</a></li>
<li class="linkedin"><a href="#">Linked In</a></li>
</ul> </article> </div>
<!--Feedback Widget-->
<div class="column">
<article class="widget_feedback">
<h4>Feedback</h4> <form>
<input type="text" value="Full Name" name="name">
<input type="text" value="Email Address" name="email">
<textarea name="message">Your message</textarea>
<input type="submit" value="Send Message" class="button_1">
</form>
</article>
</div>
<!--Copyright Notice-->
<p class="copyright_notice">Copyright 2011 © <strong>Brand Name</strong>. All Rights Reserved.</p>
<div class="logo">
<p>Dreamweb</p>
</div>
</div>
<!--.wrapper-->
</footer>
<!--End Footer-->
Though it is supposed to big one but the actual code is very straight forward. The footer area comprises widgets where each one has a class which begins with ‘widget_’. Moreover, we have 3 <div>s along with a ‘column’ class, where social widgets and newsletter are being incorporated as appears in the design.
Images
Now, you are supposed to work with images you required for the design. Therefore, in total you require 17 images. Now open your original design files of Fireworks if you don’t have and start retrieving the images of your need. However, the most common way to retrieve the images is to designate those object which you need and them copy them. Next, create a new document by employing the dimensions of clipboard (size must be identical to copied item) and the paste the copied object here.
Logo
![]()
Now, open the original Fireworks document if you already incorporated and select the logo symbol. Next copy it by pressing Ctrl+C and paste it by creating a new document. Later, employ transparent background for the document and optimize the window through selecting PNG32 as exporting option. Simply, just go to File → Export and click Images Only and Current Page. Now, select the image folder we have already build as export destination.
Hatch pattern

Zoom the design at its maximum level and select the pattern area of 3x3px dimension by employing crop tool in Fireworks (as shown in the above image). By using the same method employed earlier export this.
Feature display

Again availing the same procedure, you are required to select all objects which are useful for display excluding gloss layers and banner.
Display image

Here, you are required to crop the display image down in the case while you employed a clipping mask as Fireworks will attempt to utilize the original dimensions of image instead of the clipped area we required.
Display Gloss
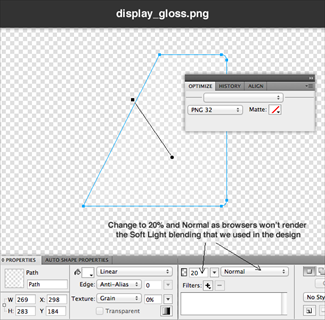
In this design, the display gloss has been set to 50% soft light. Still there is no any web browsers which is supported by such kind of blending modes such as soft light, therefore, it will treat them as normal. However, you are required to compensate and lower the opacity of display-gloss to 20%.
Button main feature

Here you are required to copy the button through the unique design and paste into another new document. Next, create a canvas that should be 3 times taller than button. Further counterfeit the button one below the another in order to occupying 1/3 of the image exactly. This is referred as the out sprite for main button along with pressed and hover states, thus the second one would be hover state and bottom one would be pressed state. Now, nudge top layer down by 3px on hover state, 1px on pressed state and transform the gradient little darker to make it appear like pressed in.
Service
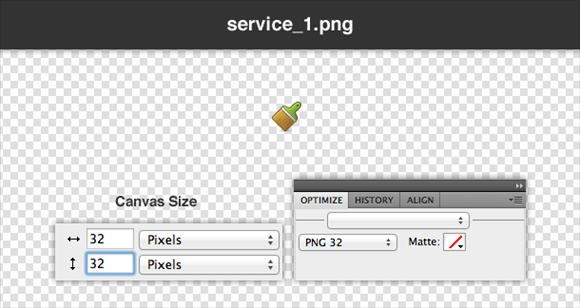
Now, you are supposed to copy the icon and paste it into a 32x32px document.
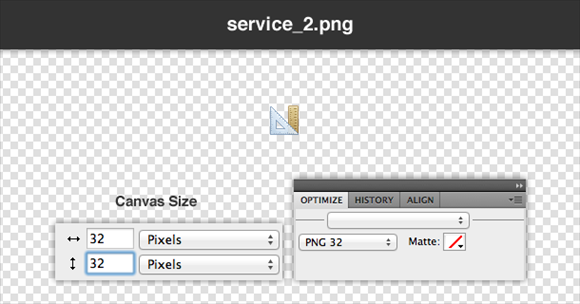
Copy and paste the icon as second service in another new 32x32px document.
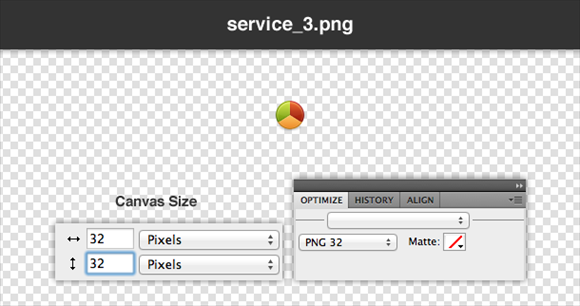
Copy and paste the icons as third service to a new 32x32px document.
Hr shadow

Enure to set the background transparent and employ the same method you adopt earlier.
About us

Employ once again the same method you employed earlier, but you have to copy the border and shadow created in the design, though it is not supported by all browsers.
social_facebook.png, social_facebook.png, social_twitter.png, social_tumblr.png,
social_behance.png, social_linkedin.png
![]()
The CSS
First thing you are required to perform is to open the style.css file and let’s employ the basic reset in order to make this sporting will all new and old browsers.
/* CSS Reset */
body,div,dl,dt,dd,ul,ol,li,h1,h2,h3,h4,h5,h6,pre,form,fieldset,input,p,blockquote,th,td{margin:0;padding:0;}
table{border-collapse:collapse;border-spacing:0;}
fieldset,img{border:0;}
ul{ list-style:none; list-style-position:outside;}
a { outline: none;}

/* Tell old browsers how to handle HTML5 elements */
header, footer, aside, nav, article {display: block;}
Next, you are supposed to perform essential styles which include heading, body, link, paragraph and wrapper styles. Almost all these are remains same for most of the web projects and are considered as the first things assigned in a stylesheet.

/* Essentials */ body {
background: #F9FCFC;
color: #666666;
font-family: "Helvetica Neue", Helvetica, Arial, sans-serif;
font-size: 12px;
}
p {
line-height: 150%;
}
h1, h2, h3, h4, h5, h6 {
font-family: Pacifico, "Helveitca Neue", Helvetica, Arial, sans-serif;
font-weight: lighter; /*counteract strong browser anti-aliasing*/
}
a:link, a:visited {
color: #168FAD;
text-decoration: none;
}
.wrapper {
width: 960px;
margin: 0 auto;
}
We are supposed to define only height and background for header. However CSS3 is very useful towards this direction as it eliminate the necessity to use images for gradient backgrounds. Simply you can define only start and end points as well as gradient type, also internet explorer 6 is supported by basic filters and gradients.
/*Header */
header {
height: 110px;
}
header { /* Fallback Color */
background: #F4F8F9; /* Firefox 3.6+ */
background-image: -moz-linear-gradient(#FFFFFF, #E9F2F3); /* Safari 4+, Chrome 1+ */
background-image: -webkit-gradient(linear, 0% 0%, 0% 100%, from(#FFFFFF), to(#E9F2F3)); /* Safari 5.1+, Chrome 10+ */
background-image: -webkit-linear-gradient(#FFFFFF, #E9F2F3); /* IE */
filter: progid:DXImageTransform.Microsoft.gradient(startColorstr='#FFFFFF', endColorstr='#E9F2F3');
}
Here, you will target on <a> link which sits inside the <h1> along with a class of ‘logo’. The things to be marked when retrieving the logo.png file, you are transforming those text to hide by setting text-indent to 5000px. The purpose to add text and then hiding is two-fold that boosts up it accessibility and also help in Search Engine Optimization.
/* Logo */
h1.logo a {
display: block;
width: 221px;
height: 65px;
background: url('images/logo.png') no-repeat;
float: left;
margin: 20px 0 0 10px;
text-indent: -5000px;
}
The main navigation, Time to style. Here we will define some new CSS3 properties including border, box-shadow, radius which are referred as both safe and non-essential visual elements. In modern browsers the vendor prefixes such -moz- lets you to target specific browsers, -moz- for Mozilla Firefox, -webkit- for WebKit (Chrome and Safari). But in the case when HTML5 and CSS3 meets the specifications it will eliminate the necessity of vendor prefixes.
/* Main Navigation */
header ul {
float: right;
margin: 35px 0;
}
header li {
float: left;
display: inline-block;
width: 90px;
height: 36px;
margin: 0 10px 0 0;
}
header li a {
color: #2C6069;
display: block;
width: 90px;
height: 36px;
text-align: center;
font-weight: bold;
line-height: 36px;
border: 1px solid #CDE0E4;
-moz-border-radius: 5px;
-webkit-border-radius: 5px;
border-radius: 5px;
-moz-box-shadow: 0 1px 0 #FFFFFF;
-webkit-box-shadow: 0 1px 0 #FFFFFF;
box-shadow: 0 1px 0 #FFFFFF;
}
header li a { /* Fallback Color */
background: #E8F4F6; /* Firefox 3.6+ */
background-image: -moz-linear-gradient(#FFFFFF, #DFF0F3); /* Safari 4+, Chrome 1+ */
background-image: -webkit-gradient(linear, 0% 0%, 0% 100%, from(#FFFFFF), to(#DFF0F3)); /* Safari 5.1+, Chrome 10+ */
background-image: -webkit-linear-gradient(#FFFFFF, #DFF0F3); /* IE */
filter: progid:DXImageTransform.Microsoft.gradient(startColorstr='#FFFFFF', endColorstr='#DFF0F3');
}
header li a:hover { /* Fallback Color */
background: #FFFFFF; /* Firefox 3.6+ */
background-image: -moz-linear-gradient(#FFFFFF, #E8F4F6); /* Safari 4+, Chrome 1+ */
background-image: -webkit-gradient(linear, 0% 0%, 0% 100%, from(#FFFFFF), to(#E8F4F6)); /* Safari 5.1+, Chrome 10+ */
background-image: -webkit-linear-gradient(#FFFFFF, #E8F4F6); /* IE */
filter: progid:DXImageTransform.Microsoft.gradient(startColorstr='#FFFFFF', endColorstr='#E8F4F6');
}
header li.active a {
color: #5E8D94;
-moz-box-shadow: inset 0 2px 3px #436E7D;
-webkit-box-shadow:inset 0 2px 3px #436E7D;
box-shadow: inset 0 2px 3px #436E7D;
}
header li.active a { /* Fallback Color */
background: #DFF0F3; /* Firefox 3.6+ */
background-image: -moz-linear-gradient(#DFF0F3, #FFFFFF); /* Safari 4+, Chrome 1+ */
background-image: -webkit-gradient(linear, 0% 0%, 0% 100%, from(#DFF0F3), to(#FFFFFF)); /* Safari 5.1+, Chrome 10+ */
background-image: -webkit-linear-gradient(#DFF0F3, #FFFFFF); /* IE */
filter: progid:DXImageTransform.Microsoft.gradient(startColorstr='#DFF0F3', endColorstr='#FFFFFF');
}
This style has been implemented to the main feature, we have layer up the computer screen, gloss from the screen, image on the screen and banner separately employing ‘position:absolute’ and ‘position:relative’ properties.
/* Main Feature */
 section.home_feature {
height: 480px;
background: #CDE0E4 url('images/hatch_pattern.png') repeat;
-moz-box-shadow: inset 0 5px 9px #66888E;
-webkit-box-shadow: inset 0 5px 9px #66888E;
box-shadow: inset 0 5px 9px #66888E;
}
article.main_display
{
display: block;
float: left;
position: relative;
width: 450px;
height: 397px;
margin: 70px 0;
background: url('images/feature_display.png') no-repeat;
}
article.main_display img {
position: absolute;
top: 23px;
left: 19px;
}
article.banner_new {
position: absolute;
left: -6px;
top: -6px;
background: url('images/feature_banner.png') no-repeat;
width: 103px;
height: 103px;
}
article.banner_new p {
text-indent: -5000px;
}
article.main_display .display_gloss {
position: absolute;
top: 2px;
right: 2px;
width: 269px;
height: 283px;
background: url('images/display_gloss.png') no-repeat;
}
article.feature_text {
float: right;
width: 450px;
margin: 60px 10px 0 0;
}
article.feature_text h2 {
font-size: 44px;
color: #2C5F66;
line-height: 120%;
margin: 0 0 20px 0;
text-shadow: 0 1px 0 #F1F7F8;
}
article.feature_text p {
color: #5E8C92;
text-shadow: 0 1px 0 #F1F7F8;
}
article.feature_text a {
display: block;
width: 310px;
height: 62px;
color: #FFFFFF;
background: url('images/btn_main_feature.png') no-repeat;
margin: 20px 0 0 0;
text-align: center;
line-height: 54px;
font-family: Pacifico, "Helveitca Neue", Helvetica, Arial, sans-serif;
font-weight: lighter; /*counteract strong browser anti-aliasing*/
font-size: 22px;
text-shadow: 0 -1px 0 #38474A;
}
article.feature_text a:hover {
background-position: 0 -63px;
line-height: 57px;
}
article.feature_text a:active {
color: #EFEFEF;
background-position: 0 -126px;
line-height: 58px;
}
The feature of featured services at first instances attempt to use our generic button class ‘button_1’ that will be called out several times through out the entire design.
/* Featured Services */

ul.featured_services {
clear: both;
height: 240px;
width: 960px;
margin: 0 auto;
background: url('images/hr_shadow.png') no-repeat bottom;
}

ul.featured_services li {
width: 300px;
margin: 0 10px;
float: left;
}

ul.featured_services h3 {
font-size: 25px;
color: #168FAD;
text-indent: 40px;
}

ul.featured_services li.service_1 h3 {
background: url('images/icn_service_1.png') no-repeat; background-position: 0 10px;
}

ul.featured_services li.service_2 h3 {
background: url('images/icn_service_2.png') no-repeat; background-position: 0 10px;
}

ul.featured_services li.service_3 h3{
background: url('images/icn_service_3.png') no-repeat; background-position: 0 10px;
}

ul.featured_services p {
border-left: 3px solid #CDE0E4;
margin: 10px 0 10px 15px;
padding: 0 0 0 25px;
}

.button_1 {
display: block;
width: 133px;
height: 28px;
-moz-border-radius: 50px; -webkit-border-radius: 50px; border-radius: 50px;
text-align: center;
line-height: 28px;
border: 1px solid #ADC0C4;
color: #5E8C92;
font-weight: bold;
font-size: 12px;
cursor: pointer;
}

.button_1 {
/* Fallback Color */
background: #DFF0F3;
/* Firefox 3.6+ */
background-image: -moz-linear-gradient(#FFFFFF, #EFEFEF);
/* Safari 4+, Chrome 1+ */
background-image: -webkit-gradient(linear, 0% 0%, 0% 100%, from(#FFFFFF), to(#EFEFEF));
/* Safari 5.1+, Chrome 10+ */
background-image: -webkit-linear-gradient(#FFFFFF, #EFEFEF);
/* IE */
filter: progid:DXImageTransform.Microsoft.gradient(startColorstr='#FFFFFF', endColorstr='#EFEFEF');
}

.button_1:hover {
background: #FFFFFF;
}

.button_1:active {
background: #EFEFEF;
}
Styles for the About Us blurb
/* About Us Blurb */

article.about_us_blurb {
clear: both;
float: left;
width: 620px;
margin: 20px 10px;
}

article.about_us_blurb img {
float: left;
margin: 0 10px 0 0;
}

article.about_us_blurb h3 {
font-size: 25px;
color: #168FAD;
margin: 10px 0;
}

article.about_us_blurb p {
margin: 5px 20px 30px 10px;
}

article.testimonials {
float: right;
width: 300px;
margin: 20px 10px;
}
Useful styles for the testimonials
/* Testimonials */

.testimonial_wrapper {
background: #E7F4F6;
border: 1px solid #CDE0E4;
width: 298px;
height: 150px;
-moz-border-radius: 5px;
-webkit-border-radius: 5px;
border-radius: 5px;
}
article.testimonials h3 {
font-size: 25px;
color: #168FAD;
margin: 10px 0;
}
p.testimonial_quote {
text-align: center;
background: #FFFFFF;
color: #5E8C92;
font-style: italic;
height: 55px;
-moz-border-radius: 5px;
-webkit-border-radius: 5px;
border-radius: 5px;
padding: 30px 20px;
}
p.testimonial_name {
line-height: 36px;
font-weight: bold;
text-align: center;
color: #5E8C92;
}
The footer and its widgets
/* Footer */
footer {
clear: both;
height: 400px;
background: #CDE0E4 url('images/hatch_pattern.png') repeat;
color: #5E8C92;
}
footer h4 {
font-size: 25px;
color: #2C5F66;
margin: 0 0 10px 0;
clear: both;
}
footer .column {
float: left;
display: inline_block;
width: 300px;
margin: 20px 10px;
} /* Widgets */
article.widget_twitter li {
margin: 20px 0;
}
article.widget_social li {
float: left;
display: inline_block;
}
footer input[type=text], footer textarea {
width: 200px;
height: 20px;
border: none;
color: #FFFFFF;
-moz-border-radius: 5px;
-webkit-border-radius: 5px;
border-radius: 5px;
padding: 5px 10px;
margin: 10px 0;
text-shadow: 0 1px 0 #0F2326;
}
footer input[type=text]:focus, footer textarea:focus {
outline: none;
}
footer textarea {
height: 53px;
}
footer input[type=text], footer textarea { /* Fallback Color */
background: #46737B; /* Firefox 3.6+ */
background-image: -moz-linear-gradient(#2C5F67, #5C858C); /* Safari 4+, Chrome 1+ */
background-image: -webkit-gradient(linear, 0% 0%, 0% 100%, from(#2C5F67), to(#5C858C)); /* Safari 5.1+, Chrome 10+ */
background-image: -webkit-linear-gradient(#2C5F67, #5C858C); /* IE */
filter: progid:DXImageTransform.Microsoft.gradient(startColorstr='#2C5F67', endColorstr='#5C858C');
}
article.widget_newsletter input[type=text] {
width: 130px;
-moz-border-radius: 5px 0 0 5px;
-webkit-border-radius: 5px 0 0 5px;
border-radius: 5px 0 0 5px;
float: left;
}
article.widget_newsletter input[type=submit] {
margin: 10px 0 0 0;
float: left;
display: block;
border: 1px solid #4E7A81;
width: 70px;
height: 30px;
-moz-border-radius: 0 5px 5px 0;
-webkit-border-radius: 0 5px 5px 0;
border-radius: 0 5px 5px 0;
text-align: center;
line-height: 28px;
border: 1px solid #ADC0C4;
color: #5E8C92;
font-weight: bold;
font-size: 12px;
cursor: pointer;
}
article.widget_newsletter input[type=submit] { /* Fallback Color */
background: #DFF0F3; /* Firefox 3.6+ */
background-image: -moz-linear-gradient(#FFFFFF, #EFEFEF); /* Safari 4+, Chrome 1+ */
background-image: -webkit-gradient(linear, 0% 0%, 0% 100%, from(#FFFFFF), to(#EFEFEF)); /* Safari 5.1+, Chrome 10+ */
background-image: -webkit-linear-gradient(#FFFFFF, #EFEFEF); /* IE */
filter: progid:DXImageTransform.Microsoft.gradient(startColorstr='#FFFFFF', endColorstr='#EFEFEF');
}
article.widget_newsletter input[type=submit]:hover {
background: #FFFFFF;
}
article.widget_newsletter input[type=submit]:active {
background: #EFEFEF;
}
We will attempt to use one master style for position and dimensions for the social links including an individual style for every icon setting with distinct background image.
/* Social Links */
article.widget_social ul li a {
display: block;
width: 32px;
height: 32px;
text-indent: -5000px;
margin: 0 10px 0 0;
}
article.widget_social ul li.facebook a {
background: url('images/social_facebook.png') no-repeat;
}
article.widget_social ul li.twitter a {
background: url('images/social_twitter.png') no-repeat;
}
article.widget_social ul li.tumblr a {
background: url('images/social_tumblr.png') no-repeat;
}
article.widget_social ul li.behance a {
background: url('images/social_behance.png') no-repeat;
}
article.widget_social ul li.linkedin a {
background: url('images/social_linkedin.png') no-repeat;
}
footer .button_1 {
color: #5E8C92;
}
And eventually, the style for footer section and logo style will be too much identical used in header.
/* Copyright Logo */

footer p.copyright_notice {
clear: both;
padding: 20px 0 0 0;
}
footer .logo {
float: right;
width: 221px;
height: 65px;
background: url('images/logo.png') no-repeat;
margin: -40px 10px 0 0;
text-indent: -5000px;
}
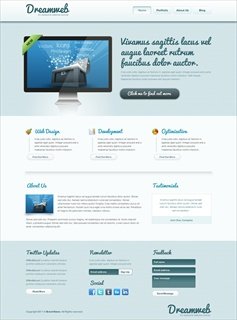
And finally, you have accomplish this. You have successfully coded and designed a complete homepage template that will look something like this.
Comments
0 comments