Since long time we have discussed so many articles & posts about WordPress, WordPress themes/Templates, WordPress Tools & Tutorials. But today we will learn to customize the WordPress features and functionalities. However, one most great and notorious thing about WordPress is its flexibility. In the case, if you don’t like its theme or avid to convey a distinct look you can change its theme in very easy and convenient way. If you want of include a functionality you can implement accordingly by downloading or purchasing a plugin. On the other hand, you can also create it yourself. However, you can alter lot of things in WordPress according to your need and requisites. Thus, through this WordPress tutorial post we are going to learn some easy and convenient ways to customize WordPress about which you must know that.
Changing The Default Source Of jQuery
One of the great achievement of WordPress on which it flaunts is that it comes locked and loaded with almost all types of libraries of JavaScript including jQuery. Also, it offers you to transform those libraries sources as per your needs. Further, let’s proceed to lessen some stress from server through switching over the jQuery version of WordPress for a hosted solution. It is very simple and affable to modify the jQuery source in account of this function even without meeting any hurdles.
function add_scripts()
{
wp_deregister_script( 'jquery' );
wp_register_script( 'jquery', 'http://code.jquery.com/jquery-1.7.1.min.js');
wp_enqueue_script( 'jquery' );
}
add_action('wp_enqueue_scripts', 'add_scripts');
Here, three distinct things are going on. First we are employing wp_deregister_script() which says WordPress to wipe out the jQuery version which is currently being in use. Then, we would look over wp_register_script() which is used to register jQuery (as the name of script) through employing own CDN version of jQuery. Eventually, we would attempt to employ wp_enqueue_script() in order to include jQuery to our plugin or theme.
One noticeable thing is here to mark that we are employing add_action() rather than of add_filter(), to include our scripts. As we are not going to attempt towards making any kind of alteration to the content, but instead depending on WordPress in order to perform something towards loading our script, we opt to employ an action hook rather than of a filter hook.
Add Image Sizes
As we are acquainted that WordPress allows some distinct image sizes to upload. However, you will be pleased to know that it grant permission to designate your sizes of images to upload just in two easy and simple functions. In the case, if we have incorporated a custom header image for our post with 760 x 300 pixels of dimension, then with this we can upload our images of that respective size.
add_theme_support( 'post-thumbnails' );
add_image_size( 'post-header', 760, 300, true );
From above attributes, the first function is add_theme_support() which says WordPress to not to allow thumbnails only but also for featured images and new size images. Another function is add_image_size() which tends us to include our images of new sizes. Also, this function is capable to accept four more arguments including name, height, width and option to crop the image. Moreover, WordPress strongly suggests against employing some specific reserved names such as: thumb, thumbnail, medium, large and post-thumbnail.
However, once we have created out new size for images, we can include this to the lop of post in order to make it appear for users.
if ( has_post_thumbnail() )
{
the_post_thumbnail( 'post-header' );
}
Thus, it attempts to analyze whether you have uploaded an image or employ it as featured image of the post. If so, WordPress show it. Moreover, it allows you to include a default fallback image.
if ( has_post_thumbnail() )
{
the_post_thumbnail( 'post-header' );
}
else
{
<img src="'. IMAGES .'/default.jpg" alt="Post Header Image" />
}
Thus, in the case, if a post doesn’t incorporate thumbnail then it automatically falls back to image set by default.
Change the Sidebar’s Markup
Registration of a sidebar’s markup is very easy and simple. Towards this endeavor all you required is only a name and an ID to make it clear in admin area:
register_sidebar
( array
(
'name' => __( 'Sidebar', 'main-sidebar' ),
'id' => 'primary-widget-area'
)
);
Now, on behalf of us WordPress will implement the default markup which can be customized in default style as we desire. Also, it allows you to include your own style and markup as you want. As for illustration, we will use divs for widgets on sidebar as they seems to be more appropriate than list items. Also, we are supposed to prefer h3 for heading of widget because h2 has been reserved for post title for blog.
register_sidebar
( array
 (
'name' => __( 'Sidebar', 'main-sidebar' ),
'id' => 'primary-widget-area',
'description' => __( 'The primary widget area', 'wpbp'),
'before_widget' => '<div class="widget">',
'after_widget' => "</div>",
'before_title' => '<h3 class="widget-title">',
'after_title' => '</h3>',
)
);
It will provide a sidebar that looks as follow:

Alter The RSS Widget’s Refresh Rate
The inbuilt RSS widget of WordPress is literally superb, but sometime it meet some hindrances that it is unable to update it. But still this is not an issue, as we have a simple solution to resolve this. Only we have to put the below provided code to your functions.php file:
add_filter( 'wp_feed_cache_transient_lifetime',
create_function('$a', 'return 600;') );
Here, you will observe that as we are using add_filter() function of WordPress, which is capable to accepts a filter hook, callback function either as optional or priority. The refresh rate of feed is cultivated by the wp_feed_cache_transient_lifetime hook. In account of create_function of PHP we will create our callback function on the fly which in seconds returns the refresh rate. Here, the refresh rate is set to 10 minutes for hours.
Add Content To The RSS Feed
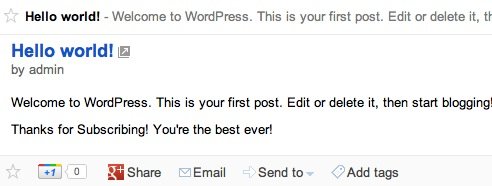
The WordPress is capable to incorporate targeted content in brilliant way to an RSS feed, which is literally very elegant. However, the targeted content may include anything like a hidden message, advertisements or value-added content. In the example which sits below, we will include a hidden message.
function add_to_feed($content)
{
$content .= "<p>Thanks for Subscribing! You're the best ever!</p>";
return $content;
}

add_filter( "the_content_feed", "add_to_feed" );
However, through employing the filter the_content_feed which can be only called when the feed has already created. Further we will implement a function of callback in order to append some fresh information to the content of the posts. When you will take a look over our website’s feed in Google Reader, you will get this:
Highlight The Author’s Comments
One most common practice is recommended is to set off the comments of authors from the readers’ comments.
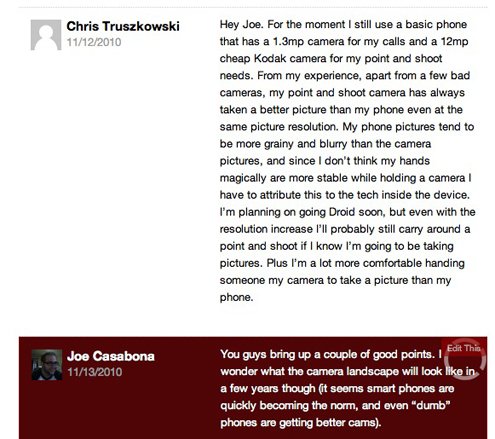
However, in order to accomplish this, we are required to do this:
.comment
{
 /* Reader comments */
background: #FFFFFF;
color: #666666;
}

.bypostauthor
{
 /* Author comments */
background: #880000;
color: #FFFFFF;
}
Next, in the case if you don’t like that WordPress recommend you to employ the markup for comments section, you can direct it to implement your own print function:
<ul class="commentlist">
<?php wp_list_comments
('type=comment&callback=my_comment_display');
?>
</ul>
Then, you are required to build a function defining the name my_comment_display(), that used to show-up your comments as you see fit.
Modify Published Content
As, we have already transformed the content of feed, once again we can perform the same action with our site’s content by employing the_content filter. Next, we are required to append the signature of author at the end of the content:
function sig_to_content($content)
{
$content .= '<p><img src="'. IMAGES .'/sig.png" alt="Joseph L. Casabona" /></p>';
return $content;
}

add_filter( "the_content", "sig_to_content" );
Now, you are congregating the add_filter() hand and the function of callback where the_content is acting as our filter. Eventually, it will include a signature at both pages and posts end. Thus in order to filter out pages, we are required to incorporate the following condition:
function sig_to_content($content)
{
if(is_single())
{
$content .= '<p><img src="'. IMAGES .'/sig.png" alt="Joseph L. Casabona" /></p>';
return $content;
}
}
The function is_single() is useful to analyze that if we are looking a single post as opposed to the relationship of content status.
Customize The Search Bar
On the same note, it allows you to customize your search bar by generating a template page defining the name as searchform.php, that will incorporate only search form. However, in the case if no searchform.php is available by default then here is what you will get:
<form role="search" method="get" id="searchform" action="<?php echo home_url( '/' ); ?>">
<div><label class="screen-reader-text" for="s">Search for:</label>
<input type="text" value="" name="s" id="s" />
<input type="submit" id="searchsubmit" value="Search" />
</div>

</form>
Further, we would attempt to remove the label and button as well as direct the user to press ‘Enter’ to perform the action of search. We can accomplish this by adopting a very simple way to create a searchform.php template file and incorporating the code. Let’s take a look over the file in its entirety:
<!--BEGIN #searchform-->
<form class="searchform" method="get" action="<?php bloginfo( 'url' ); ?>">
<input class="search" name="s" onclick="this.value=''" type="text" value="Enter your search" tabindex="1" />
<!--END #searchform-->
</form>

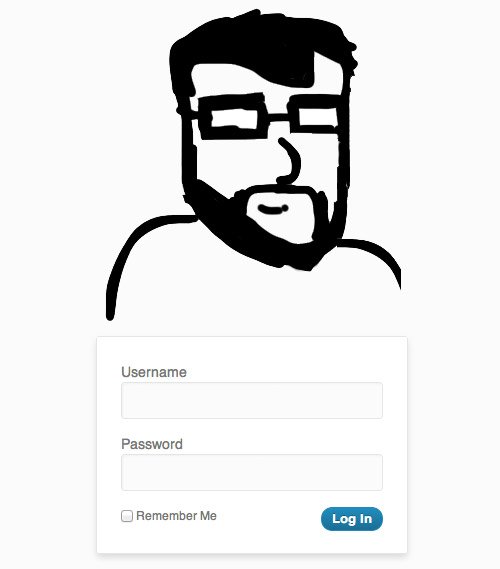
Customize WordPress’ Log-In Screen
As, myriad of methods are on our finger to accomplish this task out of which most common and play in currency is plugins. However, first of all we will take a look over the method of customizing the logo of log-in and logo URL by employing our own theme. Also, you will found the procedural of customization of logo’s URL so easy to perform. Only you are required to put a little bit of efforts to include the below provided code to your functions.php file:
add_filter('login_headerurl',
create_function(false,"return 'http://casabona.org';")
);
Likewise, refreshing the rate of RSS widget, we will merge the add_filter() and create_function() in order to congregate a distinct URL. When the login_headerurl hook is being retrieved. Modifying the image of logo is very identical in subject to theoretically though require a little bit of additional work:
add_action("login_head", "custom_login_logo");

function custom_login_logo()
{
echo "
<style>
body.login #login h1 a
{
background: url('".get_bloginfo('template_url')."/images/custom-logo.png') no-repeat scroll center top transparent;
height: 313px;
width: 313px;
}
</style%gt;
";
}
Here, we will found a hook (login_head) and a function of callback (custom_login_logo()), but rather than of add_filter(), we are employing add_action(). Thus the distinction among both two is that, when add_filter() transforms some text or default value, add_action() is supposed to run some code at a specific place in the midst of loading of WordPress.
In the function of our callback, for logo we are attempting to overwrite the default CSS (body.login#login h1 a) with that image which has been uploaded to our theme’s directory. Next, you must ensure to set the width and height as per requirements. Then whatever we will get looks like this:
Moreover, you can opt to go with plugin and designate a bunch which make you more flexible towards altering the log-in page exactly from the admin area of WordPress.
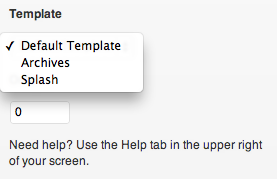
Bonus: Make A Splash Page Part Of Your Theme
As, it will not alter the WordPress’ default functionality completely, WordPress offers web-designers to include a separate splash pages in very easy manner. Simply, you are required to follow the instructions given below:
1. In your theme directory build a new file called page-splash.php (though file name doesn’t matter)
2. Next, you are supposed to include the CSS and HTML markup including everything you wish to employ. Here, the concept behind this is that the CSS and splash page layout both are probably distinct in contrast to other website.
3. Then add the following snippet at the top of page-splash.php file which says that it is a page template.
<php/*Template Name: Splash*/?>
4. Now, just proceed further to include two tags that will eventually render your page a WordPress-ready page. In the code fragment, incorporate <?php wp_head(); ?> anywhere but close to </head>). Just before the </body> tag, include <?php wp_footer(); ?>. Now, Save it.
5. Further, go ahead into the admin panel of WordPress and build a page in account of that template.
6. Next, once you have saved the page, you are required to designate Settings → Reading, and under the “Front page displays” opt for radio button “A static page.” Now make your splash page you have created as the front page.

Now I hope that you will be handful of modification options after going through this post of mine. These all modifications are dually tested and can be altered even by a novice user all thanks to the easy WordPress UI. I will love to hear your views and experience of implementing these changes to your wordpress page.
Comments
0 comments