The WordPress admin dashboard area contains many different widgets that allow users to drag-and-drop elements into their site without having to write any code. By default, WordPress comes loaded with several widgets. But, what if you like to add some functionality that the current widgets don’t support? If that’s the case, then creating a custom widget will best suit your needs.
Through this post, I’ll be explaining how you can create a custom widget in your WordPress website dashboard.
Basic Overview of Widgets in WordPress
The basic idea behind creating widgets was to provide users with an easy way to control their theme structure and design. At present, there are plenty of WordPress themes available over the web that comes prepackaged with pre-defined widgets and widget-areas. You just need to install any one of such theme, and activate your choice of widget by going to Appearance → Widgets panel from the admin dashboard screen.
Widgets are added in a theme’s widget area, which is usually a sidebar or other widget-ready areas (like footer, etc.).
Unfortunately, not all of the WordPress themes contain widgetized regions. Also, you may need to add your own custom widget in the dashboard. There are two ways to achieve such an objective, you can use a plugin or else create a widget section and a custom widget manually. For creating a widget section, you’ll first need to register it using the WordPress default function: “register_sidebar”.
Example: Demonstrating Registration Process of a Widget Section
Here’s an example demonstrating how you can create a sidebar widget area in your dashboard, wherein you can place things you would like to display in your theme’s sidebar:
register_sidebar( array(
‘name’ => __( ‘Widget Area’, ‘twentyfifteen’ ),
‘id’ => ‘sidebar-1’,
‘description’ => __( ‘Custom widget sidebar section.’, ‘twentyfifteen’ ),
‘before_widget’ => ‘<aside id=”%1$s” class=”widget %2$s”>’,
‘after_widget’ => ‘</aside>’,
‘before_title’ => ‘<h2 class=”widget-title”>’,
‘after_title’ => ‘</h2>’,
));
How to Create a Custom Widget in Your Dashboard?
Once you’ve created a widget section, it’s time to create a custom widget that your users will be able to place in that section. To do so, we’ll have to extend the WP_Widget class with several other functions, as shown in the following code that needs to be added to your WordPress theme’s functions.php file:
class First_Widget extends WP_Widget {
function First_widget() {
$widget_ops = array(‘classname’ => ‘First_widget’, ‘description’ => ‘My New First Widget’ );
$this->WP_Widget(‘First_widget’, ‘My New First Widget’, $widget_ops);
}
function widget() {
echo “My Test Widget Content”;
}
}
add_action( ‘widgets_init’, create_function(”, ‘return register_widget(“First_Widget”);’));
In this code snippet, we’re creating a function “First_widget” that will output all of the content present inside our newly created dashboard widget. Next, an array is being declared containing two arguments for the custom widget, such as:
- Classname: it specifies the name of the class that can be used to style the widget.
- Description: it displays the content that exists within the custom widget.
And then, we hook our custom dashboard widget “register_widget” function into “widgets_init”, with the help of default WordPress hook: add-action. Lastly, we’ll make a call to the class: First_Widget.
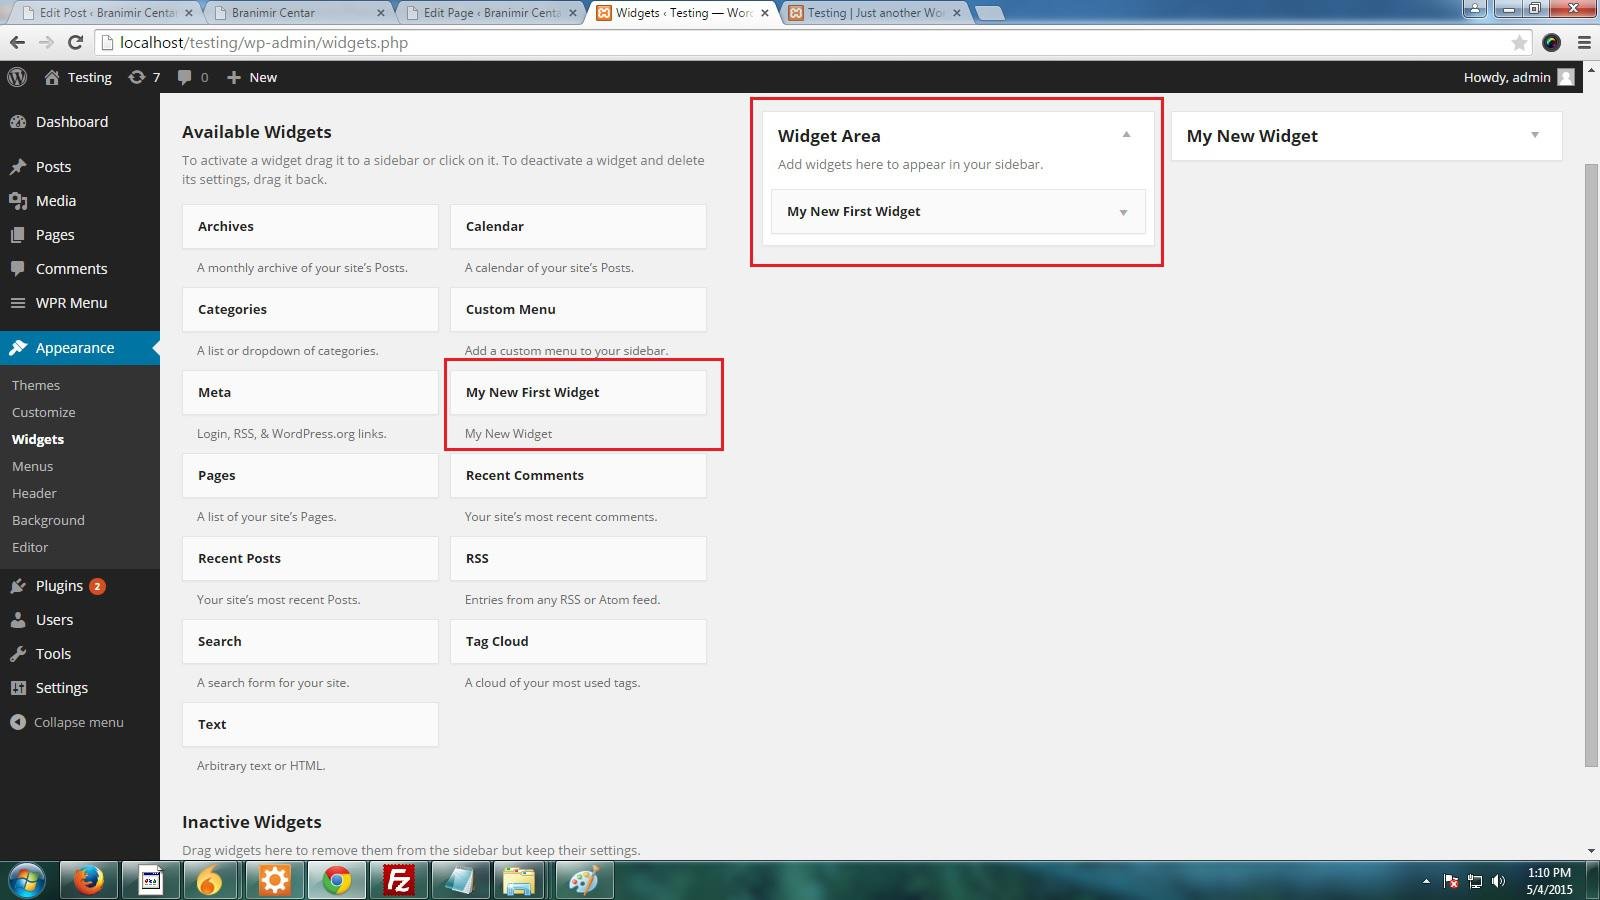
Once the above code gets executed, you’ll be able to view the custom widget “My New First Widget” in the dashboard, as shown below:
Now simply drag-and-drop the newly created custom widget in the new widget area.
Output:
Wrapping Up!
Widgets in WordPress allow you to easily add elements in your website admin dashboard, so as to make them visible to the front-end. WordPress comprises many default widgets, you can search for navigating to the widgets panel under the Appearance menu in the dashboard. But, you may need to create a custom one to fulfill your project specific needs. Furthermore, a custom widget also gives you better control over the admin dashboard screen. Going through this post will make you aware of the process of creating a custom widget in your website dashboard.
Summing Up!
WordPress widgets can be used to add custom content to your theme. You can find several default widgets out there, which are usually added to the sidebar, but can also be added to other widget-ready areas such as footer and others.
However, as your website grows, you will eventually need to embed additional functionality that the default widgets cannot offer. For instance, you may need to add a sidebar with more options displaying your product categories, or anything else your deem perfect. In that case, a good solution is to create a custom widget tailored to meet your needs.
I hope that reading this post you will better understand what widgets are, how you can create your own custom widget inside your WP site admin panel.
Author Biography:
Samuel Dawson is a technology lover and working as Front-End Developer in Designs2HTML Ltd, an effective HTML to WordPress conversion service company. Samuel also shares top secrets in new innovative technologies with everyone.


